The Magic of Natural Light
Natural light photography offers authenticity, accessibility, and a beautiful aesthetic that can be difficult to replicate with artificial lighting. As photographers, understanding how to work with natural light in various conditions is perhaps the most important skill we can develop.
One of the greatest advantages of natural light is its ever-changing quality - it transforms throughout the day, across seasons, and in different weather conditions. By learning to observe and anticipate these changes, you can leverage natural light to create images with depth, dimension, and emotional impact.
In this guide, we'll explore the characteristics of natural light at different times of day, techniques for working with various lighting conditions, and practical tips for controlling and shaping natural light to achieve your creative vision.
Understanding Light Quality
Before we dive into specific lighting situations, it's essential to understand the different qualities of natural light:
Directional vs. Diffused Light
Directional light (also called hard light) comes from a small, concentrated source like the sun on a clear day. It creates strong shadows, high contrast, and defined textures. This light can be dramatic but challenging to work with, especially for portraits.
Diffused light (also called soft light) is scattered by clouds, fog, or other surfaces. It produces soft, even illumination with gentle transitions between highlights and shadows. This light is generally more flattering for portraits and easier to work with for beginners.
Color Temperature
Natural light varies in color temperature throughout the day:
- Dawn/Early Morning: Cool blue tones gradually transitioning to warmer hues
- Midday: Neutral to slightly cool white light
- Golden Hour: Warm golden tones with amber and orange hues
- Blue Hour: Deep blue tones with cool, ethereal quality
Understanding these variations helps you plan shoots for specific moods and adjust your white balance settings appropriately.
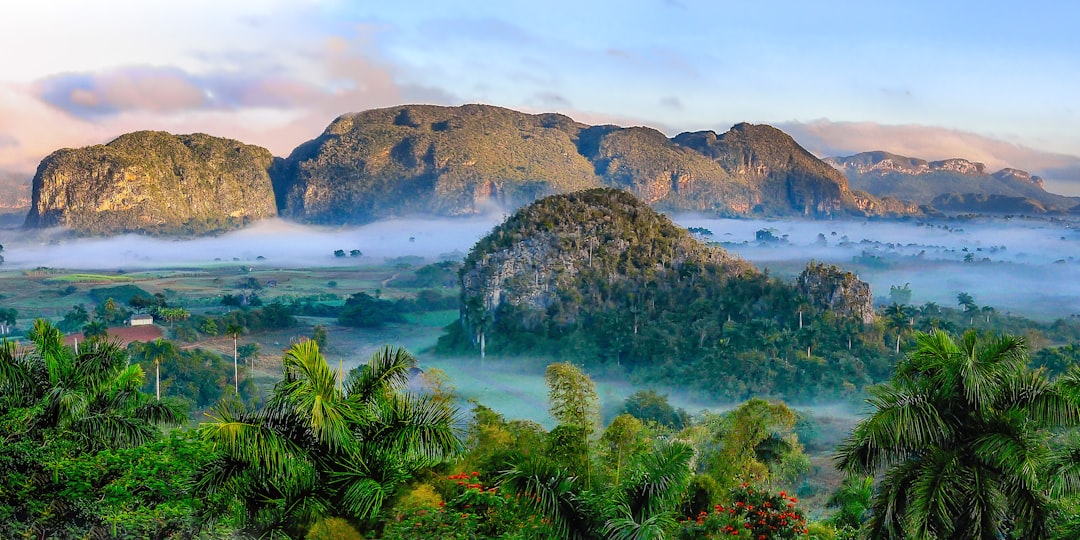
The Golden Hour: Photography's Prime Time
The golden hour refers to the period shortly after sunrise or before sunset when the sun is low in the sky, creating a warm, golden light with long, soft shadows. This is widely considered the optimal time for natural light photography for several reasons:
Characteristics of Golden Hour Light
- Warm Color Temperature: The low angle of the sun creates a warm, golden glow that enhances skin tones and adds richness to landscapes.
- Soft Directionality: The light is directional enough to create dimension but soft enough to be flattering.
- Long Shadows: The low angle creates long shadows that add depth and interest to compositions.
- Lower Contrast: The softer light reduces the dynamic range of the scene, making it easier to capture details in both highlights and shadows.
Golden Hour Techniques
- Backlighting: Position your subject with their back to the sun to create a beautiful rim light or halo effect. Expose for the face to maintain proper skin tones.
- Side Lighting: Place your subject perpendicular to the sun to create dramatic modeling on the face, with one side illuminated and the other in soft shadow.
- Silhouettes: Expose for the bright sky with your subject between you and the sun to create striking silhouettes.
- Flare: Intentionally include the sun in your frame for artistic lens flare. Partially block the sun with your subject for a more controlled effect.
Planning for Golden Hour
Since golden hour is relatively brief (typically 30-60 minutes depending on location and season), planning is crucial:
- Use apps like PhotoPills, The Photographer's Ephemeris, or Golden Hour to predict exact timing for your location.
- Scout locations in advance to identify optimal shooting positions and compositions.
- Have your equipment ready and settings pre-configured to maximize shooting time.
- Consider the direction of sunset/sunrise relative to your intended composition.
The Blue Hour: Twilight Magic
The blue hour occurs just before sunrise or after sunset when the sun is below the horizon, but its indirect light creates a brief period of soft, blue illumination. Though often overlooked, this time offers unique creative opportunities:
Characteristics of Blue Hour Light
- Cool Color Temperature: The predominant blue tones create a mysterious, ethereal mood.
- Balanced Exposure: The sky and landscape are closer in brightness, making it easier to capture both without HDR techniques.
- Artificial Lights: City lights, streetlamps, and building illumination begin to balance with the ambient light, creating compelling urban scenes.
- Low Contrast: The diffused, omnidirectional light produces minimal shadows and gentle gradations of tone.
Blue Hour Techniques
- Cityscape Photography: Capture the balance between building lights and the blue sky for dramatic urban landscapes.
- Reflections: The blue hour enhances reflections in water, glass, and wet surfaces.
- Light Painting: Use flashlights or other portable light sources to illuminate foreground elements against the blue backdrop.
- Long Exposures: Use a tripod and longer exposures to capture movement in clouds, water, or city traffic.
Technical Considerations
Blue hour photography presents some technical challenges:
- A tripod is essential due to the lower light levels.
- Use a cable release or remote trigger to prevent camera shake during longer exposures.
- Consider bracketing exposures in challenging lighting situations.
- White balance settings become particularly important - auto white balance may neutralize the blue tones you want to preserve.
Midday Light: Overcoming the Challenges
Midday light (roughly 10 am to 2 pm) is often considered the most challenging for photographers due to its harsh, overhead quality. However, with the right techniques, you can still create compelling images during these hours:
Characteristics of Midday Light
- High Contrast: Strong highlights and deep shadows create a wide dynamic range that can be difficult for cameras to capture.
- Overhead Direction: The high angle of the sun creates unflattering shadows on faces, particularly under the eyes, nose, and chin.
- Neutral Color Temperature: Midday light lacks the warmth of golden hour or the coolness of blue hour.
- Strong Intensity: The direct sunlight requires faster shutter speeds and smaller apertures.
Techniques for Midday Photography
- Find or Create Shade: Position your subject in the shade of buildings, trees, or other structures for softer, more flattering light.
- Use a Reflector: In shade, use a reflector to bounce light back onto your subject to add dimension and fill shadows.
- Embrace Contrast: Convert high-contrast scenes to black and white to transform a potential problem into a creative strength.
- Use a Diffuser: Hold a translucent diffuser between the sun and your subject to soften the harsh light for portraits.
- Backlighting: Position your subject with their back to the sun and expose for the shadow side, using a reflector or fill flash if needed.
- Look for Patterns and Textures: Harsh light can emphasize textures and create interesting shadow patterns that wouldn't be visible in softer light.
Creative Possibilities
Rather than avoiding midday light, consider subjects and genres that can benefit from it:
- Architectural photography where strong shadows create graphic elements
- Street photography with defined shadow patterns
- Abstract compositions utilizing high contrast
- Underwater photography (reduced water reflections when the sun is overhead)
Overcast Days: The Natural Softbox
Cloudy or overcast days are often underappreciated by beginning photographers, but they provide some of the most forgiving and flattering natural light conditions:
Characteristics of Overcast Light
- Soft, Diffused Quality: Clouds act as a giant softbox, scattering light and eliminating harsh shadows.
- Even Illumination: The omnidirectional quality helps reveal detail and texture without strong highlights or shadows.
- Lower Contrast: The diffused light reduces the dynamic range, making it easier to capture detail throughout the scene.
- Cooler Color Temperature: Overcast light typically has a slightly blue cast compared to direct sunlight.
Optimal Subjects for Overcast Days
- Portraits: The soft, even light flatters skin tones and minimizes unflattering shadows.
- Macro and Close-up Photography: Diffused light reveals fine details without harsh shadows or blown highlights.
- Woodland and Forest Scenes: Overcast light allows you to capture the full range of greens without dappled light patterns.
- Waterfalls and Streams: The even light prevents bright spots on water, allowing for balanced exposures at slower shutter speeds.
- Product Photography: Soft light reveals texture and form without distracting highlights.
Technical Considerations
To make the most of overcast conditions:
- Increase saturation slightly in-camera or during post-processing to counteract the flatter appearance of colors.
- Use a polarizing filter to reduce glare and enhance colors, particularly useful for foliage and water scenes.
- Include less sky in your compositions unless the clouds themselves are interesting elements.
- Consider using a reflector under your subject's face for portraits to add a catchlight to the eyes.
- Adjust white balance to warm the image slightly if the cool cast is undesirable for your subject.
Window Light: The Indoor Natural Light Studio
Window light is one of the most accessible and beautiful forms of natural light for indoor photography. It has been favored by portrait artists for centuries, from Renaissance painters to contemporary photographers:
Characteristics of Window Light
- Directional Quality: Window light is inherently directional, creating natural modeling on your subject.
- Adjustable Softness: The quality of window light varies with distance from the window, size of the window, and whether direct sunlight is entering.
- Controlled Environment: Unlike outdoor shooting, window light offers protection from wind, weather, and other environmental factors.
- Constant Direction: While the intensity may change, the direction remains consistent, allowing you to refine your composition over time.
Window Light Techniques
- Side Lighting: Position your subject perpendicular to the window for classic Rembrandt lighting with one side illuminated and the other in shadow.
- 45-Degree Lighting: Place your subject at a 45-degree angle to the window for a more balanced illumination with gentle shadows.
- Front Lighting: Position your subject facing the window for even, flattering illumination with minimal shadows.
- Silhouettes: Place your subject between the camera and a bright window, exposing for the window to create a dramatic silhouette.
Modifying Window Light
Simple modifications can dramatically alter window light quality:
- Use sheer curtains or white sheets to diffuse harsh direct sunlight.
- Place a reflector or white foam board opposite the window to bounce light back into shadow areas.
- Use black foam board or fabric to create negative fill, enhancing shadows for more dramatic portraits.
- Partially block the window with curtains or blinds to create patterns or control the light spread.
Conclusion: Becoming a Light Observer
Mastering natural light photography is an ongoing journey that begins with developing awareness. Start by observing how light interacts with your surroundings throughout the day - notice how it illuminates objects, creates shadows, and changes in quality and color.
Keep a "light journal" by photographing the same scene at different times of day and in various weather conditions. This practice will train your eye to recognize optimal lighting conditions for different subjects and help you anticipate how light will behave.
Remember that "good light" is contextual - the best lighting depends on your subject and creative vision. What matters most is learning to work with whatever light is available, either by adapting to it or modifying it to serve your artistic purpose.
With practice, you'll develop an intuitive understanding of natural light that will elevate your photography regardless of equipment or technical knowledge. After all, photography literally means "writing with light" - and natural light offers the most beautiful, varied, and accessible alphabet for your visual stories.
What's your favorite natural lighting condition to work with? Share your experiences and questions in the comments below!